

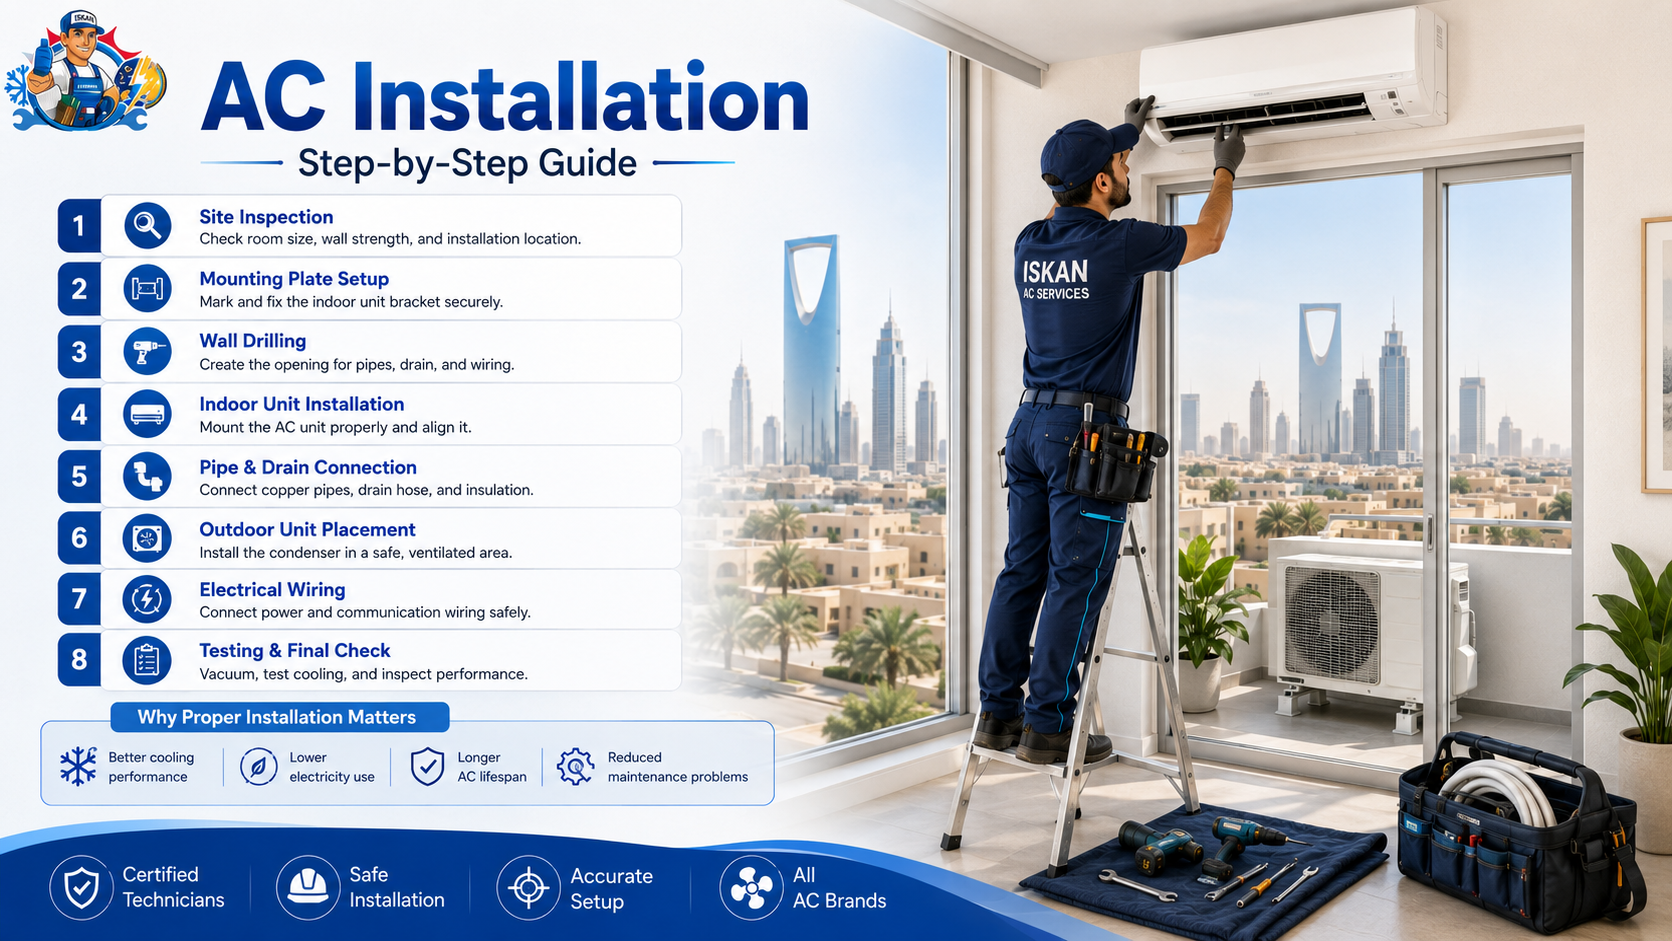
Many people think AC installation only means fixing an indoor unit on the wall and placing an outdoor unit outside. In reality, the process needs planning, accurate placement, safe wiring, proper pipe connection, drainage setup, vacuuming, leak checking, and final testing.
That is why many homeowners search for how ac installation is done before they book a technician. When you understand the basic process, you can check whether the work looks clean, safe, and professional.
A good installation helps the AC cool better, drain water properly, run with less noise, and avoid early repair problems. Poor installation can cause water leakage, weak cooling, gas leakage, vibration, high electricity use, and frequent breakdowns.
This guide explains the full AC installation process in simple steps. You will learn what happens before, during, and after installation, especially for split AC units.
What Is AC Installation?
AC installation means setting up an air conditioner so it can cool a room safely and efficiently. The process includes indoor unit placement, outdoor unit setup, copper pipe connection, drain line setup, electrical wiring, refrigerant line preparation, and system testing.
A proper installation helps the AC deliver stable cooling. It also reduces the risk of leakage, noise, poor airflow, and electrical problems.
Many people ask, “what is AC installation?” The simple answer is this: installation turns a packed AC unit into a working cooling system inside your room, office, shop, or apartment.
How AC Installation Is Done: Basic Overview
The full process starts with site inspection. A technician checks the room size, wall strength, power point, pipe route, drainage option, and outdoor unit location.
After that, the technician fixes the indoor unit, places the outdoor unit, connects the copper pipes, sets the drain line, completes the wiring, prepares the refrigerant line, and tests the system.
So, when someone asks how ac installation is done, the answer involves more than one task. A complete installation includes planning, fitting, connection, safety checking, and performance testing.
Step 1: Room and Site Inspection
A technician first checks the room and installation area. This step helps decide where the indoor and outdoor units should go.
During inspection, the technician checks room size, wall condition, sunlight exposure, window position, power supply, drainage route, and outdoor unit space.
This step matters because wrong placement can reduce cooling. For example, a blocked indoor unit cannot spread air properly. A poorly placed outdoor unit may struggle to release heat.
Good inspection prevents many future problems.
Step 2: Choosing the Indoor Unit Location
The indoor unit should sit in a place where cool air can move across the room easily. A technician should avoid placing it behind curtains, wardrobes, shelves, or large furniture.
A good indoor unit location needs open airflow, strong wall support, easy pipe access, proper drainage, and enough height from the floor.
Comfort also matters. The unit should not blow cold air directly on a bed, sofa, or work desk for long hours.
Step 3: Fixing the Mounting Plate
After choosing the location, the technician marks the wall and fixes the mounting plate. This plate holds the indoor unit.
The plate must stay straight and firm. A tilted plate can cause water drainage problems. A loose plate can create vibration and noise.
Careful marking and drilling help keep the indoor unit stable.
Step 4: Drilling the Wall Hole
The technician drills a wall hole for copper pipes, drain pipe, and cable. This hole usually needs a slight downward angle toward the outside.
That small slope helps water flow out through the drain pipe. A wrong angle can push water back toward the indoor unit and cause leakage inside the room.
This step looks simple, but it affects drainage quality.
Step 5: Preparing Copper Pipes and Drain Line
Copper pipes connect the indoor and outdoor units. These pipes carry refrigerant between both parts of the AC system.
The technician prepares the pipe route, bends the pipes carefully, connects them to the indoor unit, and adds insulation. Sharp bends can damage pipe flow, so the work needs care.
The drain line also needs proper connection. A clean drain route helps water leave the indoor unit smoothly.
Step 6: Mounting the Indoor Unit
Once the pipe and drain line are ready, the technician lifts the indoor unit and locks it onto the mounting plate.
A properly mounted indoor unit should look straight, firm, and balanced. It should not shake or tilt.
After mounting, the technician checks the pipe position, drain flow direction, and cable route behind the unit.
Step 7: Placing the Outdoor Unit
The outdoor unit releases heat from the room. It needs a stable and open location with enough airflow.
A technician may place it on a balcony, rooftop, outdoor wall bracket, service area, or ground base. The best location depends on the property layout.
The outdoor unit should have strong support, easy service access, and enough space around it. A closed or blocked area can reduce cooling performance.
Step 8: Connecting Indoor and Outdoor Units
Next, the technician connects the indoor and outdoor units with copper pipes and electrical cable.
This stage plays a major role in split AC installation. Loose pipe joints can cause refrigerant leakage. Wrong wiring can create errors or electrical issues.
A careful technician tightens the joints, checks the cable connection, and keeps the pipe route neat.
Step 9: Understanding Split AC Installation
Many people search for how split ac installation works because split AC units have two separate parts.
The indoor unit cools the room. The outdoor unit removes heat. Copper pipes, cable, and drain line connect both units.
Because of this design, split AC installation needs proper alignment between indoor and outdoor sections. A poor connection can affect cooling, drainage, and system life.
Step 10: Vacuuming the AC Line
Vacuuming removes air and moisture from the copper pipe line before the refrigerant starts moving through the system.
This step supports better performance. It also helps protect the internal system from moisture-related issues.
Some poor installations skip vacuuming to save time. A careful installation should not rush this part.
Step 11: Opening Refrigerant Flow and Checking Leaks
After vacuuming, the technician opens the refrigerant valves. Then they check the pipe joints and valve areas for leakage.
A small leak can reduce cooling and create repair problems later. That is why leak checking matters before the technician finishes the job.
Good technicians test first, then complete the final setup.
Step 12: Completing Electrical Connection
The AC needs a safe electrical connection. The technician checks the power supply, cable connection, breaker, plug point, and load capacity.
Weak wiring or loose sockets can damage the AC and create safety risks. Air conditioners use more power than many small home appliances, so the electrical setup needs proper care.
Never run an AC through unsafe extension cables or weak plug points.
Step 13: Testing the AC
After finishing the installation, the technician turns on the AC and checks performance.
They check cooling, airflow, remote control, indoor unit sound, outdoor unit sound, drainage, vibration, pipe sweating, and any error signal.
Testing confirms whether the unit runs properly. It also helps catch small issues before the technician leaves.
Step 14: Explaining Basic Use
A good technician should explain basic AC use after installation. This includes remote settings, temperature control, mode selection, filter cleaning, and maintenance timing.
The user should also ask about warning signs. Water leakage, weak cooling, strange noise, bad smell, or power tripping needs quick attention.
Good guidance helps prevent misuse and early problems.
How Long Does AC Installation Take?
Installation time depends on the AC type, wall condition, pipe length, outdoor unit location, and job difficulty.
A simple split AC installation may take a few hours. A difficult installation can take longer when the technician needs extra drilling, long piping, bracket work, or complex outdoor placement.
Speed should not matter more than quality. A rushed installation can create future repair problems.
What Makes a Good AC Installation?
A good installation looks clean and works smoothly. The indoor unit stays level. The outdoor unit remains stable. The pipes have proper insulation. The drain line removes water correctly.
Safe wiring, strong airflow, no leakage, low vibration, and smooth cooling also show good installation quality.
Common AC Installation Mistakes
Poor installation can create problems even with a new air conditioner.
A wrong indoor unit location can block airflow. A poor drain slope can cause water leakage. A weak outdoor unit base can create vibration. Loose pipe joints can cause refrigerant leakage.
Skipping vacuuming can affect performance. Unsafe wiring can create electrical risks.
These mistakes usually happen when the installer rushes or lacks proper experience.
What to Check After AC Installation
After the technician finishes the job, check more than cold air.
Look at the indoor unit. It should sit straight on the wall. Airflow should feel strong and even. Water should not drip inside the room.
Check the outdoor unit too. It should stand firmly and release hot air properly. The unit should not shake too much.
Also check the drain outlet after the AC runs for some time. Water should flow outside smoothly.
How AC Installation Affects Cooling Performance
Installation quality directly affects cooling. Even a good AC may cool poorly when the indoor unit sits in the wrong place, the outdoor unit lacks airflow, or the pipe connection leaks.
A badly planned pipe route can also reduce performance. Poor drainage may cause indoor water leakage. Unsafe wiring may create power problems.
This is why understanding how ac installation is done helps you judge the quality of the work.
Is AC Installation a DIY Job?
AC installation should not be a DIY job. The process includes drilling, wall mounting, copper piping, refrigerant line preparation, drainage setup, electrical connection, and testing.
A homeowner can choose a suitable location and clear the work area. Technical work should stay with trained AC technicians.
Wrong installation can damage the unit and create safety risks.
When Should You Call a Professional?
Call a professional when you install a new AC, move an old AC, replace copper pipes, fix leakage, install an outdoor bracket, or set up a split AC system.
Professional support also matters when the outdoor unit location is difficult or the pipe route is long.
For a cleaner and safer setup, Iskan AC can help with professional AC installation support without unnecessary hassle.
AC Installation vs AC Maintenance
AC installation and AC maintenance are different.
Installation sets up the AC for the first time. Maintenance keeps the AC working well after regular use.
Maintenance may include filter cleaning, coil cleaning, drain cleaning, gas pressure checking, and performance inspection.
A good installation helps the AC start properly. Regular maintenance helps it continue performing well.
Final Thoughts
Now you know how ac installation is done from start to finish. The process includes site inspection, indoor unit placement, wall drilling, pipe connection, outdoor unit setup, wiring, vacuuming, leak checking, drainage setup, and final testing.
A careful installation can improve cooling, reduce leakage risk, prevent noise, and support smoother performance. A poor installation can create problems even when the AC is new.
Focus on quality, not only speed. Check the unit, ask questions, and make sure the technician tests everything before leaving.
For careful AC installation support, you may contact Iskan AC and get the work handled by experienced technicians.
Book professional AC installation support today for safe setup, clean fitting, proper testing, and smoother cooling performance.
Friendly Asked Questions
1. How AC installation is done?
AC installation starts with room inspection. Then the technician fixes the indoor unit, places the outdoor unit, connects pipes and wiring, sets the drain line, prepares the refrigerant line, checks leaks, and tests cooling.
2. What is AC installation?
AC installation means setting up an air conditioner so it can cool a room safely and efficiently. The process includes mounting, piping, wiring, drainage, and testing.
3. How split AC installation works?
Split AC installation connects one indoor unit with one outdoor unit. Copper pipes, electrical cable, and a drain line connect both parts.
4. How long does AC installation take?
A simple split AC installation may take a few hours. Difficult wall work, long piping, or complex outdoor placement can increase the time.
5. Can I install an AC myself?
No, AC installation needs trained technicians. The job includes electrical work, refrigerant line setup, drilling, mounting, and testing.
6. Why is vacuuming important during AC installation?
Vacuuming removes air and moisture from the refrigerant line. This step helps the AC perform better and protects the system.
7. Why does AC leak water after installation?
AC may leak water because of poor drain slope, blocked drain pipe, wrong indoor unit angle, or bad installation alignment.
8. Where should the indoor AC unit go?
The indoor unit should go on a strong wall with open airflow, proper height, easy drainage, and no blockage from furniture or curtains.
9. Where should the outdoor AC unit go?
The outdoor unit should go in a stable, ventilated, and service-friendly place where it can release heat properly.
10. What should I check after AC installation?
Check cooling, airflow, drainage, indoor unit level, outdoor unit stability, noise, vibration, remote functions, and any sign of leakage.
